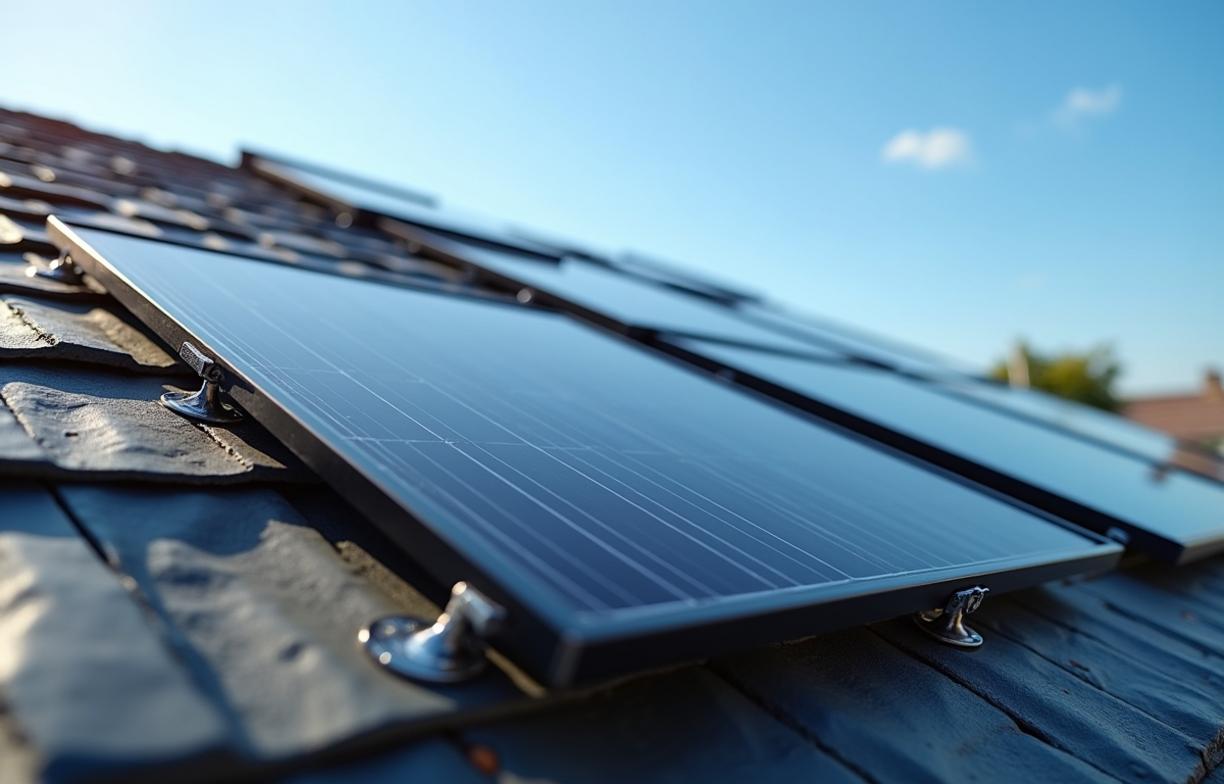
Reducing electricity costs with solar panels is possible, even on slate shingles. Many homeowners wonder how to protect the delicate nature of slate while reaping the benefits of solar energy. The good news is that it’s entirely possible to secure panels on slate without creating leaks or damaging the shingles. It just takes careful planning, the right materials, and a clear approach that respects the structure of your roof.
Factors to Consider Before Starting
Planning is essential when working with a slate roof. These shingles are more fragile than asphalt or metal roofing, so every step has to be done gently. You’ll also want to confirm that your state and local building codes allow for solar installation on slate, as regulations can vary widely. Checking these details ahead of time can save you trouble later.
Some people prefer to bring in a professional roofer before getting into the actual solar installation. This can be beneficial if you notice any cracks or if your shingles are nearing the end of their lifespan. You want strong, intact slate so that mounting hardware can be installed securely. Prioritizing roof inspections prevents unnecessary complications in the middle of your project.
Assessing Your Roof’s Readiness
Determining whether your slate shingles can safely hold solar panels is crucial. Look out for signs of wear or age, such as chipped edges or significant discoloration. If you spot any damage, consider scheduling repairs before placing a single panel. A stable foundation brings more efficiency to your entire solar setup.
You should also check slope and orientation to maximize sunlight exposure. South-facing areas generally capture the most sunlight throughout the day, though you can still get decent energy production if your roof faces a slightly different direction. A professional solar assessment may help you get precise measurements on your roof’s inclination and sun hours.
Why Slate Shingles Demand Special Care
Slate is durable in many respects, but it’s also prone to cracking if handled incorrectly. Drilling into slate calls for delicate attention, because a small mistake can promote leaks later. In contrast with materials like composite or metal, slate doesn’t “give” as easily, so it’s best to work slowly and methodically.
Choosing the Right Materials
Picking suitable racking, flashing, and fasteners is vital for solar installation. When your roof is slate, you should consider specialized mounting hardware that reduces the risk of fracturing the shingles. Many solar manufacturers carry flashing kits built for different roofing materials, including slate, to ensure a watertight seal.
You’ll also need brackets designed for your slate thickness. These brackets help distribute weight more evenly, preventing excessive stress on one part of the roof. It’s often beneficial to find hardware sets that include matching screws and washers, creating a uniform system. This coordination keeps everything aligned and secure as you move forward.
The Importance of Proper Flashing
Flashing is critical for keeping water out of your roof’s interior. When installed correctly, it diverts rain and melted snow away from holes you create for your mounting system. With slate roofs, you can’t afford poor flashing, because even a tiny leak can damage the underlying decking. Premium flashing material, such as stainless steel or aluminum, could offer peace of mind for years to come.
Preparing Your Slate Shingles
Before you start drilling, cleaning the area is a wise move. Dirt and debris might appear insignificant, yet these particles can cause small cracks once you add pressure from installation tools. Gently sweep away loose material, and think about a mild wash with a gentle cleaner if your roof is especially dirty. This step helps you see any overlooked signs of age or hairline fractures, which you can fix before proceeding.
If you need to walk on your slate roof, do so carefully use roof jacks or temporary walkways where possible. Keeping your weight distributed avoids excessive stress on any single shingle. Additionally, rubber-soled shoes with proper grip can lower the risk of accidents or missteps.
Checking for Hidden Issues
Even if your roof appears perfect, there’s a possibility of underlying structural concerns. Inspect beams and rafters from the attic. Make sure you don’t see any signs of rot or moisture, because those can weaken the ability of your roof to bear additional weight. If everything checks out, you’re ready to move forward with confidence.
Placing Rails and Mounting Hardware
Once you have a stable roof, focus on the rails or racks that will hold your solar panels in place. Typically, these rails attach to brackets that screw into your roof’s rafters. The trick is to locate rafters without damaging the slate. Using a quality stud finder made for roofs can be helpful to pinpoint exactly where you should attach your hardware.
Drill cautiously, applying even pressure to avoid cracking adjacent shingles. Slow, deliberate drilling often yields the safest results. You can use small pilot holes to confirm correct alignment and reduce the strain placed on slate when inserting screws. Once your brackets and rails are mounted, double-check that all hardware feels secure before adding any panels.
Sealing Every Penetration Point
After the rails are in place, seal all areas where you’ve cut or drilled. A specialized roofing sealant ensures moisture stays out. It’s best to follow the instructions on the product you choose, applying enough sealant for comprehensive coverage but not so much that it creates lumps. A smooth, even layer prevents water infiltration and extends the life of your system.
Setting Up the Solar Panels
With rails and sealants ready, you can move on to the actual solar modules. Lift each panel onto the mounting rails, aligning them based on the recommended spacing. Most panels have predrilled slots that make it easier to secure them with the appropriate fasteners. Make sure each clamp grips both the panel frame and rail snugly, but don’t overtighten to the point it stresses the panel glass.
Once the panels are in place, confirm they’re level and aligned with your roof’s shape. Visual consistency adds curb appeal to your home. Also remember that dust or debris can build up on your panels over time, reducing their efficiency. So, installing them at a slight angle helps rain naturally wash dirt away.
Stringing Panels Together
Depending on the design of your system, panels are typically wired in series or parallel. Series wiring boosts voltage, while parallel wiring increases current. Follow your solar manufacturer’s instructions for wiring to ensure no mistakes. Faulty wiring or mismatched connections can limit energy production and cause headaches down the road.
Connecting to Your Electrical System
Once your panels are set and wired, the next step is to integrate them into your home’s electrical system. You might install a separate inverter (often placed in a garage or utility room), or use microinverters mounted behind each panel. Both options convert direct current (DC) from your panels into alternating current (AC) that powers your home.
At this point, a licensed electrician can complete the hookup to your breaker panel. If you plan to take advantage of net metering, you might need an upgraded meter that measures bidirectional energy flow. Doing this correctly ensures you get credit for the excess power you feed back into the grid. Remember to keep an eye on local electrical codes, as they sometimes require additional components like disconnect switches for safety.
Testing and Inspection
When the electrician finishes wiring, it’s time to test your new solar installation. Turn on the system and watch the inverter or monitoring app to confirm the panels generate the expected output. This is also a good moment to spot any shading issues or connectivity problems. Small adjustments to a panel’s angle or tilt can sometimes improve performance.
Some municipalities require a final inspection or permit check. A building official may look over your wiring, roof attachments, and overall installation. Having everything documented and properly installed reduces potential legal or insurance complications later.
Ongoing Maintenance for a Slate Roof Setup
Even a well-installed solar array requires periodic monitoring. Slate shingles and the areas around your mounting points should be checked for cracks or damage. Keep an eye on sealants, especially around flashings. If you discover anything that looks off, address it immediately to safeguard your roof’s integrity.
Routinely cleaning your panels can also boost efficiency. While heavy rainfall helps with most grime, a gentle rinse or wipe-down now and then can clear away stubborn residue. Just remember to avoid harsh chemicals or abrasive brushes that might scratch the panel surface. Keeping your panels clean, your hardware tight, and your roof sealed will help your system perform at its best.
When to Call a Professional
If you find significant damage to the slate, notice leaks forming, or see that your electrical production has dipped drastically, it may be time to contact a professional. Roofing contractors well-versed in slate can address cracks or alignment issues. Likewise, a trained solar technician can pinpoint whether an inverter or panel connector is malfunctioning. A prompt response can often prevent minor issues from escalating into serious problems.
Maintaining your new investment doesn’t have to be doom and gloom. A quick regular inspection, a bit of common sense, and occasional expert assistance can keep your system running for decades. Slate remains one of the more challenging roofing types to work with, but it also adds a distinctive character to your home. Combining that classic look with solar technology can amplify both the aesthetic charm and the energy savings that go along with green living.
Feel free to explore related resources on home energy upgrades in case you ever decide to expand your sustainability efforts. Whether that means installing a battery backup or automating your home’s heating and cooling, possibilities abound once you begin your solar journey. The key is to stay proactive monitor your rooftop, keep your hardware in good shape, and let the sun do the rest.